Introduction:
In school’s drawing class, you could have made many drawings like home, cup, ice-cream etc. on your drawing copy. Also, when you could have studied Mathematics, you wrote many difficult equations like integral, quadratic equation etc. Our question is, have you ever think to draw anything in Microsoft Word? If yes, it may or may not be that you succeed in doing it. And, if no, think that you have to write integral equations in a document and you have very short time. Can you do it easily? Don’t worry, we’ve solution for you! We are going to explore Draw Tab in this article.
In this article, we will tell you the purpose of ‘Draw’ tab. Moreover, how you can use its different options which are present in its ribbon. We will not rely on the Design Tab only but we’ll tell you some additional information also like Equation Tab appears when you insert an equation and many more things you must know when you will be using this tab. Screenshots are included to help you locate and understand each option. At the end, you’ll find a detailed video demonstrating the ‘Design’ tab with practical examples. We promise you that you will be able to use ‘design’ tab effectively after reading this blog completely. Let’s get started:
Draw Tab:
The ‘Draw’ Tab is very useful for adding drawing to your document. You can draw anything like equation or shape and then edit it using tools of ‘Draw’ tab as it contains many options to edit drawings. We will explaining it in a detailed way in this guide. Learn also ‘Word Tutorial: Exploring the Insert Tab‘.

Sections of Draw Tab:
There are seven sections of Draw tab present on its ribbon. They provide many options for drawing different things within document. In each section, there are some more options. We have explained these all below:
Drawing Tools
Everyone who draws something needs some tools like lead pencil, colors, page, eraser etc. In Draw tab, their is a separate section which contains all drawing tools. They have all what you need. Each option’s function is described below:

Select:
It is the first option in Drawing Tools section. It is the cursor or pointer which you have on desktop screen. You use it to select and drag objects. Use this to select objects including ink, shapes, and text areas. This is especially useful when working with objects that are behind the text. When you want to edit any drawing, you must click again on that marker with which you drew and click on this icon, then you will be able to select drawing, otherwise not.
Lasso Select:
Use this tool to group drawings. Click on it, draw a shape around the drawings you want to group, and once you complete the shape, it will automatically group and select the drawings. We have an example to tell it to you in easy words. You drew three lines with marker one by one. Now, you have to drag them from top to bottom of the page and the margin between them must remain same. Will you select them one by one? Then how you can tell the margin between them is still same? For this you can make group of these two lines and this will make them one. You can say that the margin between these lines is same as it was.
Eraser:
Eraser is also a very useful tool, it helps removing your mistakes. If you have made any mistake, you can easily remove it by using eraser. Click on Eraser dropdown, you will see that Eraser has some more options which are:
- Thickness: You can increase or decrease the thickness of eraser according to your need.
- Types of Erasers: You can use any of them according to your need. Types of erasers are:
- Eraser: It erase a complete drawing at once. When you click on a drawing, it erases the entire drawing at once. It is default eraser.
- Point Eraser: It doesn’t erase a complete drawing at once. This tool erases only the specific part where you bring and click it. It’s more precise than the Eraser, as it can remove small mistakes or portions of a drawing. To use it, click the Eraser dropdown, select ‘Point Eraser,’ and your cursor will turn into an eraser.
Pens:
- Pen 1: It’s like a marker you use daily. It’s default color is black. When you will click on its dropdown, you will see many colors available. It have 4 portions which are: ‘Thickness’, ‘Recent Colors’, ‘Colors’, and ‘More Colors’, In the color group, there are basic colors and stylish colors both will be available. There are stylish colors also available here which are: Rainbow, Galaxy, Lava, Ocean, Rose Gold, Gold, Silver and Bronze. Then there is option that you can add more colors. When you click on it, a pop-up appears, which contains two tabs, Standard and Custom and you can use any.
- Pen 2: It’s similar to Pen 1. The purpose of second Pen is that while drawing you should have similar markers of different colors and it can save time. You can use one of them with different width and color selection.
- Pen 3: It looks like lead pencil and its width is like a thin line as default. It includes options similar to those in Pen 1 and Pen 2, allowing you to use them in the same way.
Highlighter:
- You may need to highlight anything in your document. Then you could use highlighter to highlight something. We have discussed Highlighter completely in ‘Word Tutorial: Exploring the Interface and Home Tab‘.
Stencils
Stencils is the section under Draw tab which contains only one option which is:

Ruler:
You mostly use a scale to make geometrical shapes on register. In Microsoft Word also, you can bring a scale called ‘Ruler’ to draw shapes or drawings by using ruler so that they be straight. When you click this option, a ruler appears on the document page. Adjusting it can be a bit tricky since it appears at a 45-degree angle. To bring it to a 90-degree angle, follow this:
- Click on the scale to select it.
- Bring your two fingers on touchpad and do like you are zooming in an image, the angle will increase.
- And if you want to decrease the angle, do like as you are zooming out an image.
Edit:
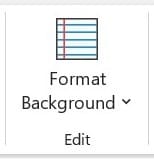
This section is very important and contains only one option. When you click its dropdown, however, it expands to reveal several more options. Each option in the Format Background dropdown is explained below:
Format Background:
Use this to add rule lines, gridlines, or change the document page’s background color. Clicking the Format Background dropdown reveals the following options, each explained below:
- Rule Lines
- Narrow Ruled: Lines will be narrow.
- College Ruled: Lines will be a bit less narrowed than Narrow Ruled.
- Standard Ruled: It has medium ruled lines.
- Wide Ruled: It has large ruled lines.
- Grid Lines
- Small Grid: Grids will be very small.
- Medium Grid: Grids will be not much small nor large.
- Large Grid: Grids will be large.
- Extra Large Grid: Grids will be more larger than Large Grid.
- Apply to Full Page
- Selecting this option applies Rule Lines or Grid Lines to the entire page.
- Which looks good.
- If you leave this option unchecked, rule lines or gridlines won’t apply to the entire page. Instead, it will create a margin space where grids or lines won’t appear, which may look better depending on your preferences.
Page Color:
- Use this option if you want to add page color. The dropdown of Format Background has a last option which is ‘Page Color’. When you click on page color dropdown following options appear:
- Theme colors and Shades: In the first row, it contains the colors which are in theme you’re using and then it has shades of each theme color.
- Standard Colors: There is a row of standard or basic colors.
- No Color: If you want to remove the background you can click on this option.
- Recent: Some of recently used colors will be also present.
- More Colors: Click on more colors, if you want to add any other. When you click on this option, a pop-up will appear which is:
- Fill Effects: This pop-up has these tabs and options:
- Gradient: You can select one or two or three or preset color sets. You can increase or decrease transparency and select Shading Styles which are Horizontal, Vertical, Diagonal Up, Diagonal Down, From Corner, From Center.
- Texture: You will see some textures which are already there and can be downloaded more by going online.
- Pattern: When you click on this option, many patterns appear. You can select any pattern from these available patterns. You can change forecolor and background according to your need.
- Picture: You can select any picture from your file explorer when you’re offline and can search online when you’re online. The picture which you will select be made teh background image of your page.
- Fill Effects: This pop-up has these tabs and options:
Convert
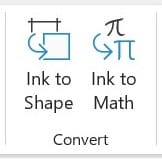
This section is used from conversion. It contains two options which are described below:
Ink to Shape:
It is the most interesting thing in Draw Tab. It is used to convert your drawing into shapes. Your drawing is called ‘Ink’. Remember, while you’re drawing shapes, draw a single shape at once, don’t divide it into parts.If you’ve selected a pencil and then ‘Ink to Shape,’ you should draw the entire shape in one go. For instance, if you want a triangle, draw it without pausing; otherwise, it won’t recognize the individual lines as one shape and won’t convert it. Draw the shape completely, and once you release the cursor, it will instantly convert to a shape.
Ink to Math:
We have told you the method of converting ink to shape. The method of converting ‘Ink to Math’ is bit similar. When you click on this option, a pop-up appear, draw equation as you are writing an equation on register. The equation which you will draw on draw section, will be converted to text equation. You have options like eraser so that you may correct your mistakes by erasing them.
Point to be Remembered:
When you insert an equation, another tab appears in the menu bar. It is called Equation Tab. Use it to edit equations. Here you will find library of many symbols which you can use in equations. It contains different sections which are explained below:

- Tools
- Equation
- Ink Equation
- Conversions
- Unicode
- LaTeX
- Text
- ex Convert
- Symbols, Structures
- Fraction
- Script
- Radical
- Integral
- Large Operator
- Bracket
- Function
- Accent
- Limit and Log
- Operator
- Matrix
Insert
This is the section which contains only only one option which is described below:
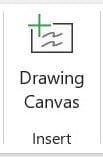
Drawing Canvas:
When you will click on this option, a drawing canvas will be inserted on the page of your document. In this canvas you can draw anything after selecting color and width of pencils you want to use and then edit them. When you have inserted an drawing, now select it with the arrow option available in the drawing tools option of Draw Tab. As you will select the drawing drew in canvas, a new tab named Shape Format will appear where you can edit more this drawing. If you want to explore Shape Format tab in detail, we have it in ‘Word Tutorial: Exploring the Insert Tab‘.
Replay And Help
These are two last sections of Draw and each section contains one option. These two are explained together below:
Ink Replay
It’s the option which is used to replay ink. When you click on this option, it automatically replay the creation of visible inks.
Ink Help
You can click on this option to get help about Ink. When you click on this options, you can discover more ink options.
In a Nutshell:
To conclude, you can draw anything on your document using drawing tools of Draw Tab. The drawing tools contains many options like color and width etc. Then you have been given an interesting tool which is: you will draw a drawing and it will be automatically changed to a shape. Also you can change your math drawing into an equation and then you can edit it also. This video is most important before you start using Draw Tab. We have told you how to use different options of Draw Tab practically. After watching the complete video, let’s know in comments that ‘Are you going to practice it on your computer or you have still any question?’. Watch the video:

