Introduction:
Microsoft Word, the most popular word processor, provides many features that you can use to make your documents professional. MS Word allows you to format these documents by using its many options present in its different tabs like Home, Insert, Draw, Design, Layout, References, etc. Here, you can perform many tasks automatically. You will be surprised by the features, you didn’t use ever before, of the references tab in MS Word.
After reading this comprehensive guide, you will be able to add various references in MS Word easily. For this, we will explain the References Tab in MS Word completely. You can use this tab to insert and edit references like Table of Contents, Footnotes, Citations & Bibliography, Captions, Index, and Table of Authorities. These references are mostly present in academic documents like books and research papers etc. Let’s start exploring the References Tab in MS Word!
References Tab in MS Word:

Add references in your Word documents by using the References Tab. The references tab is the seventh tab on the menu bar from left. Do you know? In academic documents, writers often use footnotes and endnotes to explain abbreviations and difficult terms to readers. In research papers, it is necessary to add citations and a bibliography as they act as proof of statements included in that document. Do you want to learn how to use references for such purposes? We have it all, just keep reading this article till the end!
Table of Contents
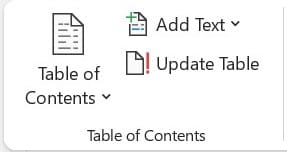
This is the first section present in the References tab in MS Word. When you open a book written in any language, it mostly contains a table of contents in its starting pages. The table of contents has the names of chapters and their respective topics. Consider chapters and topics as headings with varying levels. The following section explains the options.
Table of Contents:
Your whole academic document can have many chapters and each chapter contains many topics. MS Word can automatically make a table of contents for you just in one click with the headings you used. It is used to add or remove automatic or manual table of contents. Click on the dropdown of ‘Table of Contents’. You will see the following options:
- Automatic Table 1: It automatically adds a table of contents in which content is labelled.
- Automatic Table 2: It automatically adds a table of contents in which table of content is labelled.
- Manual Table: It doesn’t make a table of contents in advance but allows you to make a manual table.
- More Tables of Contents from Office.com: You can find more tables of contents from Office.com.
- Custom Table of Contents: Click on this option to add a custom table of contents. When you click on it, a dialog box appears. It contains options to make a custom table of contents.
- Remove Table of Contents: It removes table of contents which is included in the current document.
Add Text:
Use it to add text to the table of contents. The text in the table of contents is of different levels. It contains the following options:
- Do Not Show in Table of Contents: This option is selected in advance. When this option is selected, no text is added with this option.
- Level 1: Click on this option to add text of Level 1.
- Level 2: Click on this option to add text of Level 2.
- Level 3: Click on this option to add text of Level 3.
Understand the levels with this! For instance, Microsoft Office is the first chapter of a book. This chapter covers Microsoft Word, Microsoft Excel, and Microsoft PowerPoint. Moreover, each of these office tools includes tabs listed below them. Here, Microsoft Office has Level 1, Microsoft Word, Microsoft Excel, and Microsoft PowerPoint have Level 2 and their respective tabs have Level 3.
Update Table:
When you make changes in the current document, update the table of contents also. When you click on this option, a dialog box appears which contains the following radio buttons:
- Update Page Numbers Only: For example, if you add more paragraphs to the document, the headings will move to the next pages. Now, update the page numbers to reflect the changes. This option will only change the page numbers.
- Update Entire Table: For example, you added some more headings in some topics. Now you want to insert these headings in the table of contents. Use this option and it will automatically update the table by adding the headings you added after the last update.
Footnotes
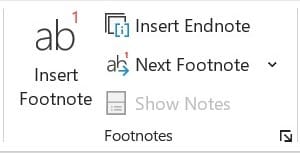
Add a footnote at the end of each page and an endnote at the end of the document. Writers mostly use footnotes to explain abbreviations or define difficult words, while endnotes provide comments, recommend books, or highlight important topics.
In your document, you can have many abbreviations or difficult words. Then, if you want to tell the reference such as from which book you used this sentence etc.
Insert Footnotes:
This option is used to insert footnotes. When you click on this option, it brings your cursor to the end of the current page, where you write the footnote. When you insert a footnote, list its number in superscript on the relevant word.
Insert Endnote:
This option is used to insert endnotes. When you click on this option it brings your cursor to the end of the document, where you write the endnotes.
Next Footnote:
It is a button with a dropdown. Click on this button and it will bring you to the next footnote. Meanwhile, the dropdown contains the following options:
- Next Footnote: It brings you to the next footnote.
- Previous Footnote: It sends you back to the previous footnote.
- Next Endnote: It brings you to the next endnote.
- Previous Endnote: It sends you back to the previous endnote.
Show Notes:
Click on this option to quickly see the footnotes and endnotes. When you click on this option, a dialog box is opened which contains the following radio boxes:
- View footnote area: When this one is selected, it will show footnotes.
- View endnote area: When this one is selected, it will show endnotes.
Research

Research means searching for anything. You can search any definition, web page, picture, or anything else you need from various online sources easily. This section has only one option which is:
Search:
Click on this option available in the Research section of the References Tab in MS Word. A sidebar will be opened and here you can search for anything. For example, if you want to download and insert any picture, use it, as it will save time.
Citations & Bibliography
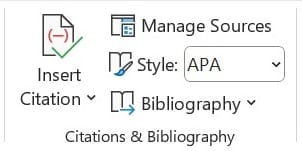
Citations refer to single references. Meanwhile, the bibliography lists all the citations used in the document. Add citations when you include statements or information from other sources and need to reference them. Place the bibliography mostly at the end of the document. You may have seen a single page or multiple pages with the title ‘Bibliography’ at the end of most academic books. Learn how to insert and manage sources and styles of Citations and Bibliography from here!
Insert Citation:
You can insert any type of citation in the document. Click on the arrow under ‘Insert Citation’ and two options will appear which are:
- Add New Source: Click on this option and a dialog box will appear. In this dialog box, you can add all information about that source. You can select the Type of Source from the options: Block, Book Section, Journal Article, Article in Periodical, Conference Proceedings, Report, Website, Document from Website, Electronic Source, Art, Sound Recording, Performance, Film, Interview, Patent, Case, Miscellaneous. Select language, title, year, and publisher also.
- Add New Placeholder: Click on this option and a mini dialog box will appear where you can change the placeholder and then click on ‘ok’.
Manage Recourses:
It is used to manage all resources used in your document. You have these sections in the dialog box:
- Search: You can search any resource you have added and then select it to manage it. Moreover, when you have no resource, click on the ‘New’ button and you can add a new resource.
- Sort By: When you have many resources, you can see and manage them by using sorting option. Here, you can sort resources by Author, Tag, Title, or Year.
- Sources available in:
- Master List: It is the box which contains all the sources which you included ever before in any document of Microsoft Word.
- Current List: This box contains the references which the current document have.
- Buttons: Manage resources using these buttons. These buttons are: copy, delete, edit and new.
- Preview (APA): The last box is the preview. The tool shows you a preview with the selected style, but you can change it after inserting it.
Style:
There are some popular styles for writing citations and bibliographies. References in MS Word can be written in various styles. Click on the dropdown available in front of Style. It contains the following styles:
- APA Sixth Edition
- Chicago Sixteenth Edition
- GB7714 2005
- GOST – Name Sort 2003
- GOST – Title Sort 2003
- Harvard – Anglia 2008
- IEEE 2006
- ISO 690 – First Element and Date 1987
- ISO 690 – Numerical Reference 1987
- MLA Seventh Edition
- SIST02 2003
- Turabian Sixth Edition
Bibliography:
List of all citations you included in the current document is called bibliography. To insert a bibliography, follow these steps:
- Select the text which you want to cite
- Click on the ‘Insert Citation’ option and select ‘Insert New Citation’ each time.
- After you have inserted all citations, select the style and then click on ‘Bibliography’.
- Select your desired bibliography, and the tool will insert it.
Captions
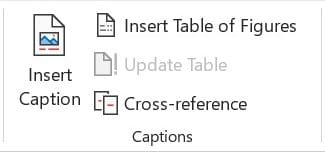
Captions describe the objects shortly. Objects can be equations, figures, tables, etc. You must have seen the pictures in academic books with the captions like ‘Figure 1.1’. How to insert captions? Described below:
Insert Caption:
You can insert a caption by clicking on the ‘Insert Caption’ option. When you click on it, a dialog box appears where you can write the caption, and select the label from the given. Furthermore, you can make a new label by clicking on the ‘New Label’ option.
Insert Table of Figures:
After you have inserted all captions, you can make a table of figures also by using this option.
Update Table:
When you have inserted a table of figures. After that, you inserted some more figures. Now, you will need to include these new figures also. You won’t need to do it manually, the ‘Update Table’ option can do it with one click only.
Cross-reference:
It is the reference that works for the current document. In simple words, a cross-reference is a reference for a specific picture or heading table, etc. within the current document. With this, you refer to any section in the current document. It can be done after inserting a caption of the object which is being referenced.
Index

It is the last-second section of the references tab. You can mark, insert, and update the important topics or words in your document and it will help the reader. It contains the following options:
Mark Entry:
This button is used to mark an entry. You will need to select the word or set of words and then click on ‘Mark Entry’.
Insert Index:
After marking all entries, click on the ‘Insert Index’ option to insert the index.
Update Index:
You have inserted the index, then added some more topics to your document, and now want to add these entries also. You will need to mark entries, then click on the ‘update index’ option and it will update the index.
Table of Authorities
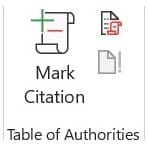
This is the last section in the References Tab. This section is used for legal documents. It contains the following options:
Mark Citation:
Select the citation and then click on Mark Citation. That citation will be marked.
Insert Table of Authorities:
You can insert a table of authorities also after marking all citations.
Update Table of Authorities:
For example, if you have inserted more data after inserting the table of authorities, then mark these also as citations. Click on ‘Update Table’ and it will update the existing table of authorities.
Final Words:
In conclusion, use the references tab in MS Word to insert references like the table of contents, footnotes, endnotes, citations & bibliography, cross-references, and more. These features are practical in most documents. We have described all these references in detail. Now, it is time to practice what you have learned from here. We encourage you to explore each option and dialog box make a table of contents and insert footnotes, endnotes, citations & bibliography and cross-reference. After completing this, share your experience with the Reference Tab in MS Word in the comments!
