Introduction:
Microsoft Word is a word processing software used to format text documents. It has tabs like Home, Insert, Draw, Design, Layout, References, etc. These tabs have many options for formatting text documents. You can use the options in these tabs to increase readability, add shapes, pictures, charts, or drawings, adjust page settings, add references, review the document, and much more. Everyone can make mistakes while making a document. And if you send or publish it without checking it completely, it is wrong. You must review documents before you publish them or send them to others. Review Tab in MS Word can help you the most in doing such work easily.
In this article, you can explore the various tools available in the review tab. We will explain all section and their options in detail. After reading this complete article, you can use the tools of the review tab efficiently. These tools will help you the most in creating professional documents. You will never miss reviewing documents after that you learn how important is it.
Review Tab in MS Word:
The review tab has 10 sections which contain different options that allow you to do such works automatically. You won’t need to proofread the whole document to correct spelling and grammar mistakes. Review in Word has the following sections:
Proofing:
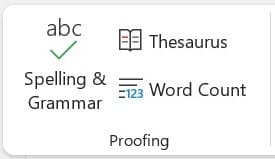
It is the first section of Review Tab in MS Word. It has wonderful options that you must use to save your time. These options are:
Spelling & Grammar
This option is used to check all the spelling and grammar mistakes. When typing in MS Word, everyone makes typos, and correcting them after searching is a very difficult task. You can do it easily by using the ‘Spelling & Grammar’ option and it will automatically refer you to all the mistakes one by one and give you suggestions also to correct them. The shortcut key for checking spelling and grammar is ‘F7’. Word temporarily underlines spelling mistakes with a red curly line and grammar mistakes with a blue double line. These underlines disappear as you correct the mistakes. Click on either the ‘spelling and grammar’ option or use the shortcut key.
Spelling Mistake Options:
A sidebar that is opened for the spelling mistake, contains the following options:
- Grammar: Here, you will see: ‘Not in Dictionary’ Then you will see a paragraph in which the mistake is defined and you’re guided about it. Additionally, you will see the sentence in which you have made a mistake. Click on the icon on the right side and your sentence will be read loudly by the Microsoft Reader.
- Suggestions: It contains suggestions for correction. You can either correct the sentence manually or click on one of the given suggestions.
- Ignore Once: Clicking on this option ignores your mistake once and removes the temporary underline, even if you do not correct the mistake.
- Ignore All: Clicking on this option causes Word to ignore all such mistakes permanently whenever they occur.
- Add to Dictionary: When you enter a new word and Word marks it as a mistake, you can click on this option to add the word to the dictionary. The next time you write the same word, Word will not mark it as a mistake.
- Language: You can change the language by clicking on this option.
Grammar Mistake Options:
Moreover, when you make a grammar mistake, you will see some extra options which are described below. When you click on it, a dialog box will appear that contains the following sections:
- Grammar: It contains these checkboxes: Adjective Used instead of Adverb, Agreement within Noun Phrases, Capitalization, Comma Missing after introductory Phrase, Comma Splice, Commonly Confused Words, Comparative Use, Hyphenation, Incorrect Verb Form after Auxiliary, Indefinite Article, Possessive and Plural Forums, Punctuation, Question Mark Missing, Spacing, Subject Verb Agreement, Too many Determiners, Verb Use
- Clarity: It contains these checkboxes: Double Negation, Jargon, Passive Voice, Passive Voice with Unknown Actor, Split Infinitives
- Conciseness: It contains these checkboxes: Nominalizations, Wordiness
- Formality: It contains these checkboxes: Contractions, Informal Language, Slang
- Inclusiveness: It contains these checkboxes: Gender, Specific Language
- Punctuation Conventions: It contains these checkboxes: Oxford Comma, Punctuation Required with Quotes, Space between Sentences
- Vocabulary: It contains this checkbox: Clichés
- Reset All: Use this option to reset all.
Remember: After that, all spelling and grammar mistakes are corrected, a popup appears that says Spelling and Grammar Check is complete. Click on ‘OK’ and proceed.
Thesaurus
Do you want to replace any word in the document that matches most? You can use this tool as it will help you a lot. When you click on this option (Thesaurus) after selecting a word, a sidebar is opened, as a sidebar was opened for grammar and proofing. It contains a list of all the synonyms of that word. Here, also, you have the option to change the language.
Word Count
Word Count is also an important tool in MS Word. On the status bar, you can quickly see the word count. Moreover, when you select an amount of your content, it also shows the word count of that. For example, if you select a paragraph, on the status bar, it will show the word count for that option. For example, if your document has 795 words in total, if you select a paragraph or some paragraphs under a heading and want to see how many words are these, follow the following steps:
- Open the Review Tab.
- Select the desired paragraph.
- Click on the Word Count option.
- A popup appears which contain the following information:
- Pages
- Words
- Characters (no spaces)
- Characters (with spaces)
- Paragraphs
- Lines
Speech:

This section contains only one option which is related to speech and is:
Read Aloud
As its name suggests, this option is used to read aloud your document. If you want to listen to what you have entered in the document. You won’t need to use any other resource; this tool of Review Tab in MS Word will help you a lot. Simply click on this option and it will start reading your document. Moreover, you can change the language also.
Accessibility:
This section is used to make sure that your document is easily accessible. It contains only one option, that is:
Check Accessibility
It is a button with a dropdown. When you click on the button, it opens a sidebar that tells:
Inspection Results: It has a list of errors and the following are the problems. And as a result, these will not be easily accessible to the reader after you send this document to others.
For example, it may contain the following Errors:
- Missing Object Description
- Image or Object Not Inline
Moreover, when you click on the dropdown, following options can be seen:
- Check Accessibility
- Alt Text
- Navigation Pane
- Focus
- Options: Accessibility
Language:
It is a dropdown that is used to do the translation of the whole document or selection and set the language of a document. The language section has two more dropdowns which are:
Translate: Translate the document into a different language using the Microsoft Online Translation feature.
- Translate Selection: Use this to translate only what you have selected.
- Translate Document: Use this to translate the whole document.
Language: Choose the language for proofing such as spelling and grammar. You can also set other language preferences including Editing, Display, Help, etc.
- Set Proofing Language: Use this to set proofing language.
- Language Preferences: Use this to set language preferences.
Comments:
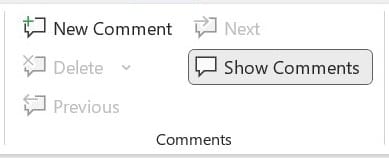
You must add comments so that when others read this document, they may get tips or notes you added. The comments section has these options:
- New Comment: Use this to add new comments. New comments are added at the place where your cursor was. This option is available all the time but others are hidden and you can’t use them. To use the other options, add at least one comment.
- Delete: Once you have added a new document in the document, you can delete the comments when needed. It is a button with a dropdown. The current comment will be deleted when you click on the button. The dropdown has three options that are: Delete, Delete All Comments Shown, and Delete All Comments in Document.
- Previous: Use this to show previous comment.
- Next: Use this to show next comment.
- Show Comments: Use this to show all comments.
Tracking:
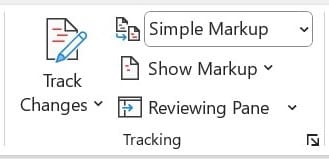
It is a button with a dropdown. Use this to track changes. That is to say, use this tracking feature of the Review Tab in MS Word when you give your document for review to others such as teammates, and with that, you want to see what they change in your document. It has the following options:
Track Changes: Use this to keep track of changes made to the current document. It has two options in its dropdown that are:
- Track Changes
- Lock Tracking
Simple Markup: It is a select box, and it contains the following options:
- Simple Markup: It shows the simple markup.
- All Markup: It shows all markup.
- No Markup: It shows no markup.
- Original: It shows the original document.
Show Markup: You can choose what types of markups to show in your document. For example, you can hide comments and formatting markups as they don’t affect the document. You can tick the things which you want to see. It contains the following options in its dropdown:
- Comments
- Insertions and Deletions
- Formatting
- Balloons
- Specific People
Reviewing Pane: This option is in the form of a button with a dropdown. Click on the button and it will open a sidebar on your desktop screen. The sidebar is a bit big but don’t be afraid of it. It is a very useful tool for Review in Word. When you click on its dropdown and then select one option either ‘Reviewing Pane Vertical’ or ‘Reviewing Pane Horizontal’, a pane will be opened. It contains all of the tracking.
Changes:
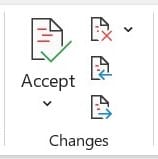
Use this section to manage changes made in your document. It contains following options:
Accept: It is a button with a dropdown. Button simply means that ‘accept and move to next’. And when you click on the dropdown it shows some options which area:
- Accept and Move to Next
- Accept This Change
- Accept All changes Shown
- Accept All Changes
- Accept All Changes
- Stop Tracking
Reject and move to next: Use this option to reject the change and move to the next change for checking that either to accept or reject it.
Previous Change: Use this option to go to previous change made to this document.
Next Change: Use this option to go to next change made to this document.
Compare:
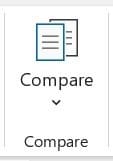
Use this option to compare two documents. You can also add revisions from different people and combine them in a single document.
Protect:

Add protection to your document. It helps that unwanted people will not have complete access. In this way, unwanted changes will not take place in the document. Click on this option and a sidebar with many options will be opened where you can choose which changes are accepted in this document.
Ink:

While reviewing documents, ink can bring distractions. For this, Review in Word has a useful option that hides all of the ink used in the document just in one click. Click on this option again and it makes the ink visible.
Linked Notes:

OneNote will keep links back to this document for each line of notes. You can open the OneNote notes by clicking this button again.
Final Words:
In a few words, reviewing documents before publishing is very important. Review Tab in MS Word has different sections that help you to correct mistakes via its automatic tools such as Spelling and Grammar etc. You can manage comments and track changes. Add protection to your document when needed. All these sections and their options of review tab are discussed in detail. Tell us in the comments how was your experience with Review in Word.


